How to install n8n: the complete self-hosting guide for every platform

n8n is the workflow automation platform that gives you full control over your data and infrastructure. But "how do I install it?" is the number one question I see from people getting started.
The answer depends on your budget, technical comfort, and how much control you want. After deploying 300+ production workflows and helping hundreds of people set up their instances, I've tested every installation method worth using.
This guide covers all of them — from zero-config cloud hosting to bare-metal VPS setups — with real costs, actual commands, and honest pros and cons.
Why self-host n8n?
n8n offers a managed cloud service and a self-hosted option. Both run the same software. The difference is who manages the infrastructure.
Self-hosting makes sense when you:
- Want full control over your data (no third-party access)
- Need to run workflows on internal networks or behind firewalls
- Want to avoid per-workflow or per-execution pricing
- Need custom configurations the cloud doesn't support
- Already have server infrastructure you're paying for
Self-hosting does NOT make sense when you:
- Don't want to manage servers, SSL, or updates
- Value your time more than the cost difference
- Need guaranteed uptime without doing the work yourself
- Are just getting started with n8n
Let me be direct: if you're new to n8n, start with n8n Cloud. Learn the platform first, then self-host when you have a reason to. Too many people spend weeks setting up infrastructure instead of building workflows.
n8n Cloud (easiest)
Difficulty: Beginner | Monthly cost: $24–$300+ | Setup time: 2 minutes
n8n Cloud is the managed hosting option run by the n8n team. You sign up, pick a plan, and you're building workflows in under two minutes. No servers, no Docker, no SSL certificates.
What you get
- Automatic updates to the latest n8n version
- Managed PostgreSQL database with backups
- SSL/HTTPS out of the box
- 99.9% uptime SLA on higher tiers
- Built-in authentication and user management
- Priority support from the n8n team
Pricing tiers (as of January 2026)
| Plan | Price | Executions | Active workflows | Best for |
|---|---|---|---|---|
| Starter | $24/mo | 2,500 | 5 | Personal projects |
| Pro | $60/mo | 10,000 | 15 | Small teams |
| Enterprise | Custom | Unlimited | Unlimited | Organizations |
Note: Pricing may change. Check n8n.io/pricing for current plans.
Who it's for
- Beginners who want to learn n8n without infrastructure headaches
- Non-technical users who need automation without DevOps
- Small teams that value time over money
- Anyone who just wants their workflows to run
Pros and cons
| Pros | Cons |
|---|---|
| Zero setup required | Monthly cost adds up |
| Automatic updates | Less control over configuration |
| Managed backups | Execution limits on lower tiers |
| SSL included | Data on third-party servers |
| Priority support | Can't access server filesystem |
My take: n8n Cloud is the right choice for 70% of people. The cost is worth the time you save not managing infrastructure. Start here, self-host later if you need to.
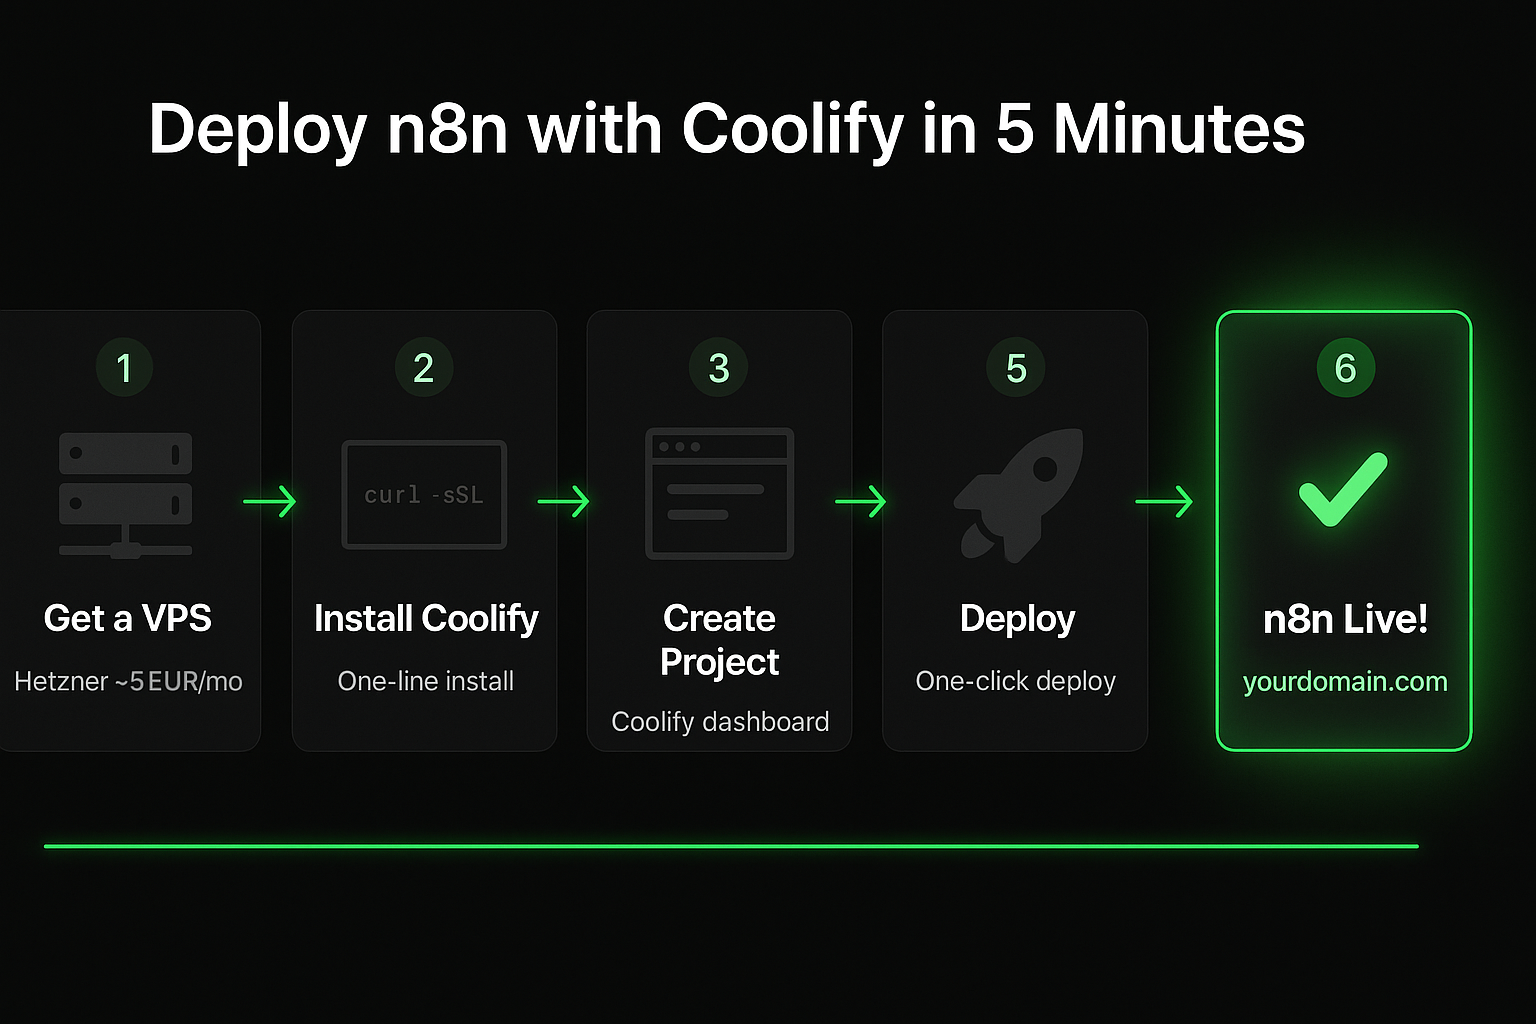
Coolify (recommended for self-hosting)
Difficulty: Intermediate | Monthly cost: $5–20 (VPS only) | Setup time: 15–30 minutes
This is what WotAI uses. Coolify is a self-hosted platform-as-a-service (PaaS) — think of it as your own private Heroku. You install it on a VPS, and it gives you a web UI for deploying applications, managing databases, SSL certificates, and more.
Why Coolify over plain Docker? Because it handles the annoying parts: reverse proxy, SSL renewal, environment variables, container restarts, and one-click updates. You get the control of self-hosting with the convenience of a managed platform.
Prerequisites
- A VPS with at least 2GB RAM (4GB recommended)
- Ubuntu 22.04+ or Debian 12+
- A domain name pointed to your server IP
- SSH access to your server
Step 1: Install Coolify
SSH into your server and run the one-liner:
curl -fsSL https://cdn.coollabs.io/coolify/install.sh | bash
This installs Docker, Docker Compose, and the Coolify application. When it's done, access the Coolify dashboard at http://your-server-ip:8000.
Step 2: Set up your project
- Create a new Project in Coolify (e.g., "n8n Production")
- Add a new Environment (e.g., "Production")
- Choose Docker Compose as the deployment method
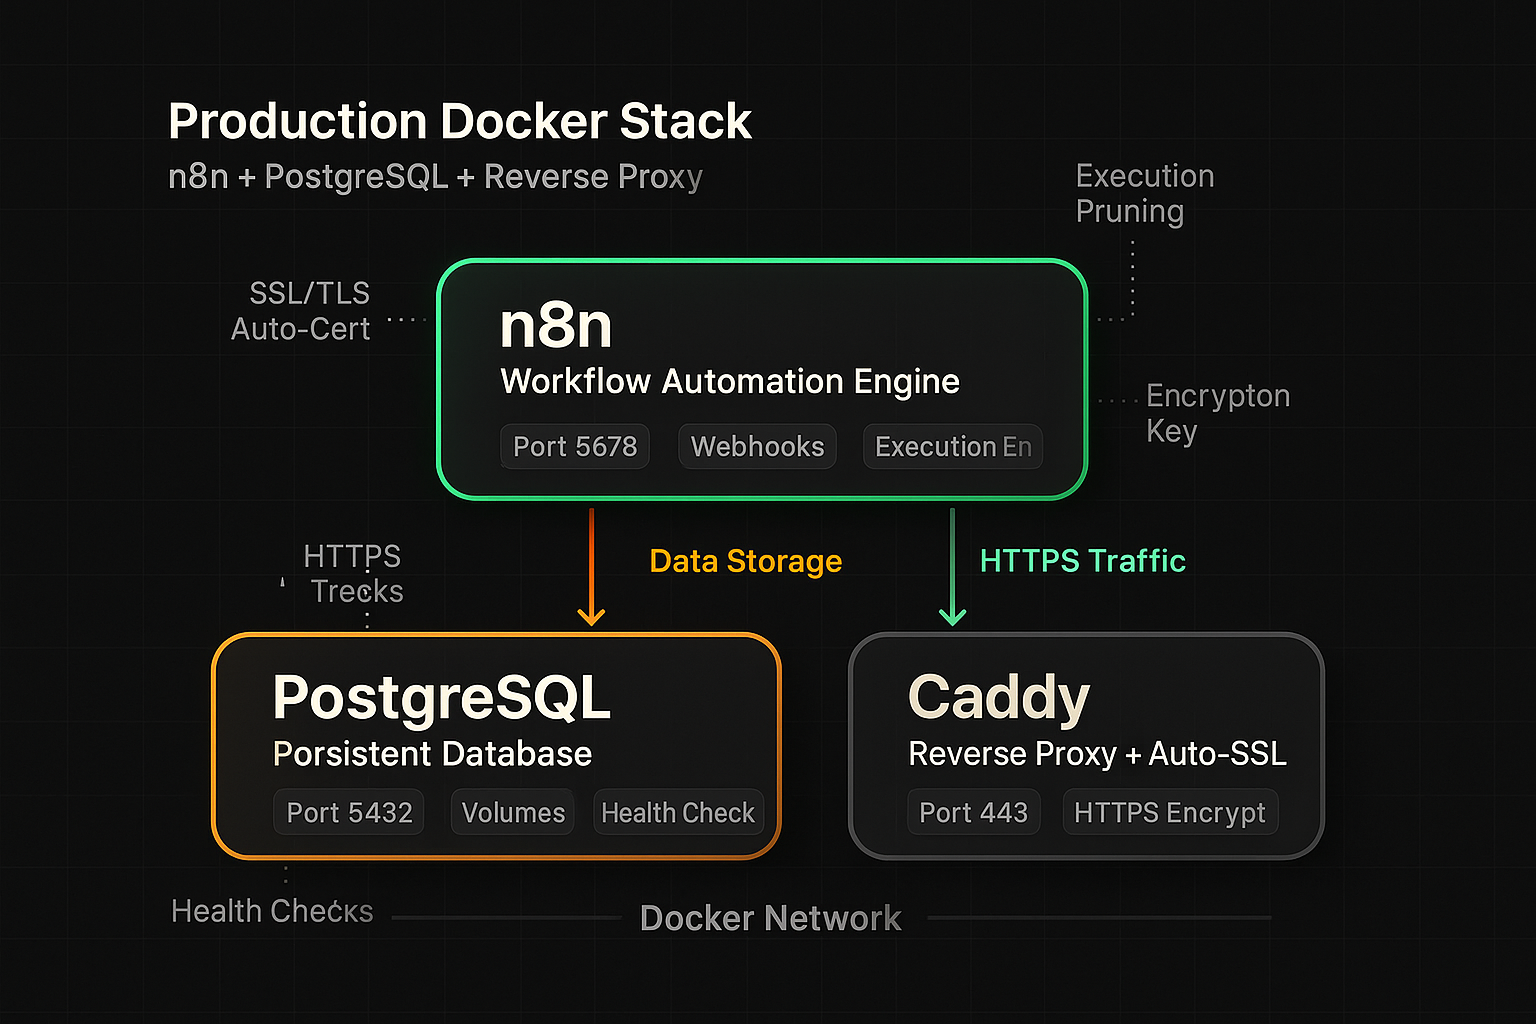
Step 3: Docker Compose configuration
Paste this Docker Compose config into Coolify:
services:
  n8n:
    image: n8nio/n8n:latest
    restart: always
    ports:
      - "5678:5678"
    environment:
      - N8N_HOST=${N8N_HOST}
      - N8N_PORT=5678
      - N8N_PROTOCOL=https
      - NODE_ENV=production
      - WEBHOOK_URL=https://${N8N_HOST}/
      - GENERIC_TIMEZONE=America/Los_Angeles
      # Database
      - DB_TYPE=postgresdb
      - DB_POSTGRESDB_HOST=postgres
      - DB_POSTGRESDB_PORT=5432
      - DB_POSTGRESDB_DATABASE=n8n
      - DB_POSTGRESDB_USER=n8n
      - DB_POSTGRESDB_PASSWORD=${DB_PASSWORD}
      # Execution settings
      - EXECUTIONS_DATA_PRUNE=true
      - EXECUTIONS_DATA_MAX_AGE=168
      # Encryption
      - N8N_ENCRYPTION_KEY=${N8N_ENCRYPTION_KEY}
    volumes:
      - n8n_data:/home/node/.n8n
    depends_on:
      postgres:
        condition: service_healthy

  postgres:
    image: postgres:16-alpine
    restart: always
    environment:
      - POSTGRES_USER=n8n
      - POSTGRES_PASSWORD=${DB_PASSWORD}
      - POSTGRES_DB=n8n
    volumes:
      - postgres_data:/var/lib/postgresql/data
    healthcheck:
      test: ["CMD-SHELL", "pg_isready -U n8n"]
      interval: 10s
      timeout: 5s
      retries: 5

volumes:
  n8n_data:
  postgres_data:
Step 4: Environment variables
In Coolify's environment variables section, set:
N8N_HOST=n8n.yourdomain.com
DB_PASSWORD=your-secure-database-password-here
N8N_ENCRYPTION_KEY=your-random-encryption-key-here
Important: Generate a strong
N8N_ENCRYPTION_KEYwithopenssl rand -hex 32. This key encrypts your stored credentials. Lose it and you lose access to all saved credentials.
Step 5: Configure domain and SSL
In Coolify's service settings:
- Set the domain to
n8n.yourdomain.com - Coolify automatically provisions an SSL certificate via Let's Encrypt
- It handles reverse proxy configuration through its built-in Traefik or Caddy setup
Deploy, and you're done. Your n8n instance is live at https://n8n.yourdomain.com.
Updating n8n on Coolify
Coolify makes updates trivial:
- Go to your n8n service in the Coolify dashboard
- Click Redeploy (it pulls the latest image)
- Done
Or enable Auto Update in Coolify to pull new versions automatically.
Who it's for
- Self-hosters who want a managed experience without paying for cloud
- Small teams deploying multiple services (n8n + databases + other apps)
- Anyone who doesn't want to manually manage Nginx, SSL, and Docker
Pros and cons
| Pros | Cons |
|---|---|
| Web UI for management | Need to install and maintain Coolify itself |
| Automatic SSL via Let's Encrypt | Coolify uses some RAM (~500MB) |
| One-click redeploys and rollbacks | Extra layer of abstraction |
| Built-in database management | Newer project, still maturing |
| Free and open source | Learning curve for Coolify itself |
| Supports multiple apps on one server | — |
My take: Coolify is the best option for self-hosting n8n. It removes the tedious parts (SSL, reverse proxy, container management) while giving you full control. This is what I recommend to anyone who wants to self-host but doesn't want to manage raw Docker.
Hostinger VPS
Difficulty: Intermediate | Monthly cost: $5–13 | Setup time: 30–45 minutes
Hostinger is a budget-friendly VPS provider that works well for single n8n instances. Their KVM VPS plans start low and include decent specs for the price.
Recommended specs
| Plan | RAM | CPU | Storage | Monthly cost |
|---|---|---|---|---|
| KVM 1 | 4GB | 2 vCPU | 50GB NVMe | ~$6/mo |
| KVM 2 | 8GB | 4 vCPU | 100GB NVMe | ~$10/mo |
For a single n8n instance with PostgreSQL, 4GB RAM is the sweet spot.
Step 1: Create and access your VPS
- Sign up at Hostinger and create a VPS with Ubuntu 22.04
- Note your server IP and root password from the dashboard
- SSH into your server:
ssh root@your-server-ip
Step 2: Initial server setup
# Update packages
apt update && apt upgrade -y

# Create a non-root user
adduser n8nuser
usermod -aG sudo n8nuser

# Set up firewall
ufw allow OpenSSH
ufw allow 80
ufw allow 443
ufw enable

# Switch to new user
su - n8nuser
Step 3: Install Docker
# Install Docker
curl -fsSL https://get.docker.com | sh

# Add your user to the docker group
sudo usermod -aG docker $USER

# Log out and back in for group changes to take effect
exit
su - n8nuser

# Verify Docker is working
docker --version
Step 4: Install Docker Compose
# Docker Compose comes with Docker now, verify:
docker compose version
Step 5: Set up n8n with Docker Compose
Create a project directory and configuration file:
mkdir -p ~/n8n && cd ~/n8n
Create docker-compose.yml:
services:
  n8n:
    image: n8nio/n8n:latest
    restart: always
    ports:
      - "5678:5678"
    environment:
      - N8N_HOST=n8n.yourdomain.com
      - N8N_PORT=5678
      - N8N_PROTOCOL=https
      - NODE_ENV=production
      - WEBHOOK_URL=https://n8n.yourdomain.com/
      - GENERIC_TIMEZONE=America/Los_Angeles
      - DB_TYPE=postgresdb
      - DB_POSTGRESDB_HOST=postgres
      - DB_POSTGRESDB_PORT=5432
      - DB_POSTGRESDB_DATABASE=n8n
      - DB_POSTGRESDB_USER=n8n
      - DB_POSTGRESDB_PASSWORD=${DB_PASSWORD}
      - EXECUTIONS_DATA_PRUNE=true
      - EXECUTIONS_DATA_MAX_AGE=168
      - N8N_ENCRYPTION_KEY=${N8N_ENCRYPTION_KEY}
    volumes:
      - n8n_data:/home/node/.n8n
    depends_on:
      postgres:
        condition: service_healthy

  postgres:
    image: postgres:16-alpine
    restart: always
    environment:
      - POSTGRES_USER=n8n
      - POSTGRES_PASSWORD=${DB_PASSWORD}
      - POSTGRES_DB=n8n
    volumes:
      - postgres_data:/var/lib/postgresql/data
    healthcheck:
      test: ["CMD-SHELL", "pg_isready -U n8n"]
      interval: 10s
      timeout: 5s
      retries: 5

volumes:
  n8n_data:
  postgres_data:
Create a .env file:
# Generate secure values
echo "DB_PASSWORD=$(openssl rand -hex 16)" > .env
echo "N8N_ENCRYPTION_KEY=$(openssl rand -hex 32)" >> .env
Start n8n:
docker compose up -d
Step 6: Set up reverse proxy with Caddy
You need a reverse proxy for SSL. Caddy is the simplest option:
# Install Caddy
sudo apt install -y debian-keyring debian-archive-keyring apt-transport-https
curl -1sLf 'https://dl.cloudsmith.io/public/caddy/stable/gpg.key' | sudo gpg --dearmor -o /usr/share/keyrings/caddy-stable-archive-keyring.gpg
curl -1sLf 'https://dl.cloudsmith.io/public/caddy/stable/debian.deb.txt' | sudo tee /etc/apt/sources.list.d/caddy-stable.list
sudo apt update
sudo apt install caddy
Edit the Caddyfile:
sudo nano /etc/caddy/Caddyfile
n8n.yourdomain.com {
    reverse_proxy localhost:5678
}
Restart Caddy:
sudo systemctl restart caddy
Caddy automatically obtains and renews SSL certificates. Your n8n instance is now live at https://n8n.yourdomain.com.
Who it's for
- Budget-conscious self-hosters who want decent specs at a low price
- Beginners to VPS — Hostinger has a friendlier dashboard than most providers
- Single-instance setups — one n8n per server
Pros and cons
| Pros | Cons |
|---|---|
| Very affordable ($5–13/mo) | Manual server management |
| Good dashboard for beginners | No managed platform features |
| NVMe storage included | Limited data center locations |
| Decent performance for price | Support quality varies |
Docker on any VPS
Difficulty: Intermediate | Monthly cost: $5–50+ (depends on provider) | Setup time: 20–30 minutes
This is the universal method. Docker works on any VPS from any provider — DigitalOcean, Linode, Vultr, AWS, Google Cloud, Azure, you name it. If you already have a VPS or prefer a specific provider, this is your path.
Minimum requirements
| Resource | Minimum | Recommended |
|---|---|---|
| RAM | 2GB | 4GB |
| CPU | 1 vCPU | 2 vCPU |
| Storage | 20GB | 50GB+ |
| OS | Ubuntu 22.04+ / Debian 12+ | Ubuntu 24.04 LTS |
The Docker Compose setup
This is the same compose file used in the Hostinger section, and it works everywhere. Here it is with all the options you might want:
services:
  n8n:
    image: n8nio/n8n:latest
    restart: always
    ports:
      - "5678:5678"
    environment:
      # Core settings
      - N8N_HOST=${N8N_HOST}
      - N8N_PORT=5678
      - N8N_PROTOCOL=https
      - NODE_ENV=production
      - WEBHOOK_URL=https://${N8N_HOST}/
      - GENERIC_TIMEZONE=${TIMEZONE:-UTC}
      # Database (PostgreSQL)
      - DB_TYPE=postgresdb
      - DB_POSTGRESDB_HOST=postgres
      - DB_POSTGRESDB_PORT=5432
      - DB_POSTGRESDB_DATABASE=n8n
      - DB_POSTGRESDB_USER=n8n
      - DB_POSTGRESDB_PASSWORD=${DB_PASSWORD}
      # Execution management
      - EXECUTIONS_DATA_PRUNE=true
      - EXECUTIONS_DATA_MAX_AGE=168
      - EXECUTIONS_DATA_SAVE_ON_ERROR=all
      - EXECUTIONS_DATA_SAVE_ON_SUCCESS=none
      # Security
      - N8N_ENCRYPTION_KEY=${N8N_ENCRYPTION_KEY}
      - N8N_USER_MANAGEMENT_DISABLED=false
    volumes:
      - n8n_data:/home/node/.n8n
    depends_on:
      postgres:
        condition: service_healthy

  postgres:
    image: postgres:16-alpine
    restart: always
    environment:
      - POSTGRES_USER=n8n
      - POSTGRES_PASSWORD=${DB_PASSWORD}
      - POSTGRES_DB=n8n
    volumes:
      - postgres_data:/var/lib/postgresql/data
    healthcheck:
      test: ["CMD-SHELL", "pg_isready -U n8n"]
      interval: 10s
      timeout: 5s
      retries: 5

volumes:
  n8n_data:
  postgres_data:
Environment file
Create a .env file next to your docker-compose.yml:
# Server
N8N_HOST=n8n.yourdomain.com
TIMEZONE=America/Los_Angeles

# Database
DB_PASSWORD=change-this-to-a-secure-password

# Security (generate with: openssl rand -hex 32)
N8N_ENCRYPTION_KEY=change-this-to-a-random-string
Running it
# Start in background
docker compose up -d

# Check logs
docker compose logs -f n8n

# Stop
docker compose down

# Update to latest version
docker compose pull
docker compose up -d
Reverse proxy options
Docker exposes n8n on port 5678, but you need a reverse proxy for SSL and to serve on port 443. Three options:
Option A: Caddy (simplest)
n8n.yourdomain.com {
    reverse_proxy localhost:5678
}
Caddy handles SSL automatically. Two lines. Done.
Option B: Nginx
server {
    listen 443 ssl;
    server_name n8n.yourdomain.com;

    ssl_certificate /etc/letsencrypt/live/n8n.yourdomain.com/fullchain.pem;
    ssl_certificate_key /etc/letsencrypt/live/n8n.yourdomain.com/privkey.pem;

    location / {
        proxy_pass http://localhost:5678;
        proxy_http_version 1.1;
        proxy_set_header Upgrade $http_upgrade;
        proxy_set_header Connection "upgrade";
        proxy_set_header Host $host;
        proxy_set_header X-Real-IP $remote_addr;
        proxy_set_header X-Forwarded-For $proxy_add_x_forwarded_for;
        proxy_set_header X-Forwarded-Proto $scheme;
        chunked_transfer_encoding off;
        proxy_buffering off;
        proxy_cache off;
    }
}
Note the WebSocket upgrade headers — n8n needs these for the editor UI.
Option C: Traefik (for multi-service setups)
Add labels to your Docker Compose:
n8n:
  labels:
    - "traefik.enable=true"
    - "traefik.http.routers.n8n.rule=Host(`n8n.yourdomain.com`)"
    - "traefik.http.routers.n8n.tls.certresolver=letsencrypt"
    - "traefik.http.services.n8n.loadbalancer.server.port=5678"
Who it's for
- Developers who already have a VPS and want to add n8n to it
- Anyone using a provider not specifically covered in this guide
- Teams that need custom Docker configurations
Pros and cons
| Pros | Cons |
|---|---|
| Works on any provider | Manual SSL setup (unless using Caddy) |
| Full configuration control | More commands to remember |
| Flexible and portable | Updates require manual pull |
| Well-documented by n8n | Need to manage reverse proxy yourself |
Railway / Render
Difficulty: Beginner | Monthly cost: $5–20+ (usage-based) | Setup time: 5–10 minutes
Railway and Render are cloud PaaS platforms that let you deploy Docker containers without managing servers. They're a middle ground between n8n Cloud and full self-hosting.
Railway
- Go to railway.app and create an account
- Click New Project → Deploy a Template
- Search for "n8n" — there's a community template that sets up n8n with PostgreSQL
- Click Deploy
- Railway provisions the database, sets up the environment, and gives you a URL
- Add a custom domain in the project settings
Alternatively, deploy from a Docker image:
- Create a new project
- Add a PostgreSQL service
- Add a new service → Docker Image →
n8nio/n8n:latest - Set environment variables (same as the Docker section above, but use Railway's PostgreSQL connection variables)
- Add a domain
Railway pricing: $5/mo base + usage. A typical n8n instance runs $8–15/mo depending on activity.
Render
- Go to render.com and create an account
- Create a PostgreSQL database (free tier available but limited)
- Create a new Web Service
- Choose Docker → image
n8nio/n8n:latest - Set the environment variables using Render's database connection details
- Set the port to
5678 - Deploy
Render pricing: Free tier (limited hours), Starter at $7/mo, Standard at $25/mo.
Warning about free tiers: Both Railway and Render have free tiers, but they spin down your service after periods of inactivity. This means scheduled workflows won't fire reliably. Always use a paid plan for production.
Who it's for
- Developers who want self-hosting without server management
- Quick prototypes and testing environments
- Teams already using Railway or Render for other projects
Pros and cons
| Pros | Cons |
|---|---|
| No server management | Usage-based pricing can surprise you |
| Quick deployment | Less control than a VPS |
| Built-in SSL and domains | Free tiers have sleep/spin-down |
| Easy scaling | Vendor lock-in potential |
| Git-based deployments | PostgreSQL add-on costs extra |
Hetzner
Difficulty: Intermediate | Monthly cost: $4–10 | Setup time: 30–45 minutes
Hetzner is the darling of the n8n community, and for good reason. They offer the best price-to-performance ratio in the VPS market, especially for European users. Their data centers are in Germany, Finland, and the US (Ashburn, VA and Hillsboro, OR).
Why Hetzner is popular in the n8n community
- Price: A 4GB RAM, 2 vCPU server costs about EUR 4.50/mo (~$5)
- Performance: ARM64 (Ampere) servers offer excellent single-thread performance
- Network: 20TB bandwidth included on most plans
- Reliability: German engineering, consistent uptime
- Community: Half the n8n forum runs on Hetzner — lots of help available
Recommended specs
| Plan | Type | RAM | CPU | Storage | Monthly cost |
|---|---|---|---|---|---|
| CAX11 | ARM (Ampere) | 4GB | 2 vCPU | 40GB | ~EUR 4.50 |
| CAX21 | ARM (Ampere) | 8GB | 4 vCPU | 80GB | ~EUR 8.50 |
| CX22 | x86 (Intel) | 4GB | 2 vCPU | 40GB | ~EUR 5.50 |
The ARM-based CAX servers are slightly cheaper and perform better for n8n workloads. Use them unless you need x86 compatibility for specific community nodes.
Quick setup
The setup is identical to the Docker section above. Here's the condensed version:
# 1. Create a Hetzner Cloud server (Ubuntu 24.04, CAX11)
# 2. SSH in
ssh root@your-hetzner-ip

# 3. Install Docker
curl -fsSL https://get.docker.com | sh

# 4. Create project directory
mkdir -p ~/n8n && cd ~/n8n

# 5. Create docker-compose.yml (use the config from the Docker section)
nano docker-compose.yml

# 6. Create .env file
echo "N8N_HOST=n8n.yourdomain.com" > .env
echo "DB_PASSWORD=$(openssl rand -hex 16)" >> .env
echo "N8N_ENCRYPTION_KEY=$(openssl rand -hex 32)" >> .env

# 7. Start n8n
docker compose up -d

# 8. Install Caddy for SSL
sudo apt install -y debian-keyring debian-archive-keyring apt-transport-https
curl -1sLf 'https://dl.cloudsmith.io/public/caddy/stable/gpg.key' | sudo gpg --dearmor -o /usr/share/keyrings/caddy-stable-archive-keyring.gpg
curl -1sLf 'https://dl.cloudsmith.io/public/caddy/stable/debian.deb.txt' | sudo tee /etc/apt/sources.list.d/caddy-stable.list
sudo apt update && sudo apt install caddy

# 9. Configure Caddy
echo 'n8n.yourdomain.com {
    reverse_proxy localhost:5678
}' | sudo tee /etc/caddy/Caddyfile
sudo systemctl restart caddy
That's it. About 10 commands and you have n8n running on one of the best value servers available.
Hetzner-specific tips
- Use the Hetzner Firewall (in their cloud console) — it's free and runs before traffic hits your server
- Enable backups in Hetzner's dashboard (~20% extra) for server-level snapshots
- Use Falkenstein or Helsinki data centers if you're in Europe — lowest latency
- Use Ashburn if you're in North America
Who it's for
- Budget-optimizers who want the most server for their money
- European users who want GDPR-compliant hosting
- The n8n community — if you ask for help, half the responders will be on Hetzner
Pros and cons
| Pros | Cons |
|---|---|
| Best price-to-performance ratio | Manual server management |
| ARM servers are fast and cheap | European companies may have language barrier |
| 20TB bandwidth included | US data centers are newer/fewer |
| Hetzner Firewall is free | Dashboard is functional, not pretty |
| Strong n8n community support | No managed n8n template |
Local development
Difficulty: Beginner | Monthly cost: Free | Setup time: 2–5 minutes
Running n8n locally is perfect for testing workflows, learning the platform, or building before deploying to production. Two options: npx for quick runs, or npm for persistent installs.
Option A: npx (fastest, no install)
npx n8n
That's it. One command. n8n starts on http://localhost:5678.
This downloads n8n temporarily and runs it. Data is stored in ~/.n8n/ by default.
Option B: npm global install (persistent)
# Install globally
npm install -g n8n

# Run
n8n
Same result, but n8n stays installed on your machine. Updates with npm update -g n8n.
Option C: Docker (local)
docker run -it --rm \
  --name n8n \
  -p 5678:5678 \
  -v n8n_data:/home/node/.n8n \
  n8nio/n8n
This is useful if you want to test the same Docker environment you'll use in production.
When to use local development
- Learning n8n — follow tutorials without paying for hosting
- Building workflows — test before deploying to production
- Testing community nodes — try nodes before adding them to your live instance
- Debugging — reproduce issues in an isolated environment
When NOT to use local development
- Scheduled workflows — your laptop needs to be open and running
- Webhooks — external services can't reach
localhost(unless you use a tunnel like ngrok) - Production anything — local is for testing only
- Team collaboration — others can't access your local instance
Pro tip: If you need external webhooks while developing locally, use ngrok to tunnel:
ngrok http 5678. SetWEBHOOK_URLto the ngrok URL.
Pros and cons
| Pros | Cons |
|---|---|
| Completely free | Must keep machine running |
| Instant setup | No external access |
| Great for learning | Uses SQLite by default |
| Isolated testing | Not suitable for production |
| No server needed | Webhooks don't work without tunneling |
Comparison table
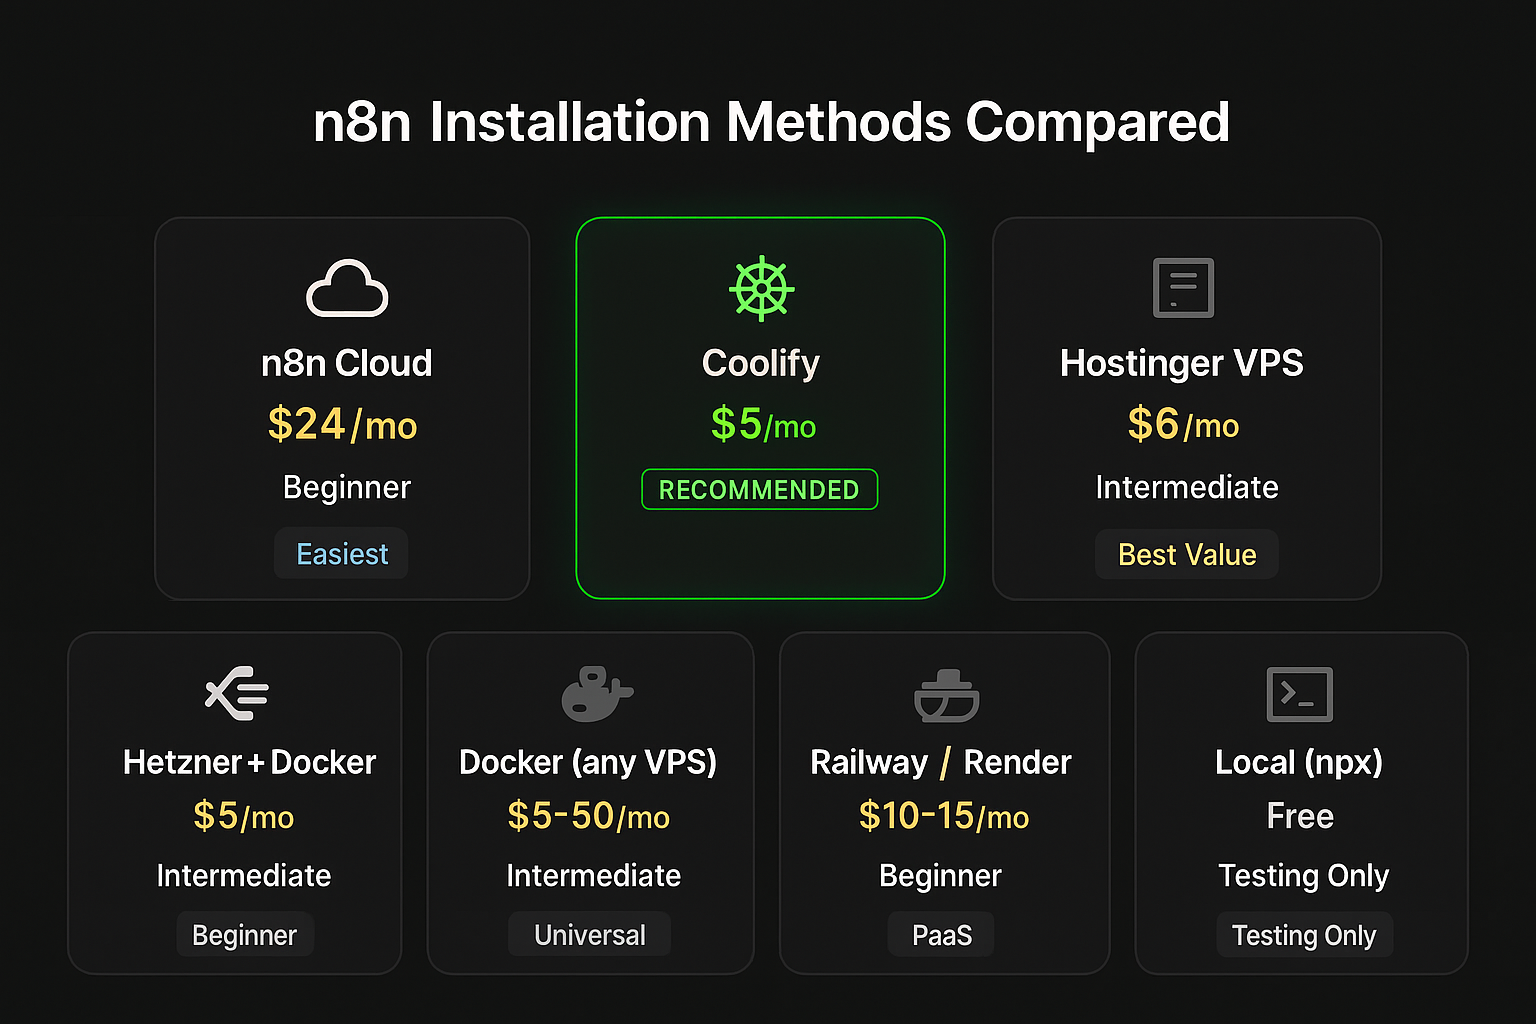
Here's every method side by side.
| Method | Monthly cost | Difficulty | Setup time | SSL | Auto updates | PostgreSQL | Best for |
|---|---|---|---|---|---|---|---|
| n8n Cloud | $24–300+ | Beginner | 2 min | Included | Yes | Managed | Beginners, teams |
| Coolify | $5–20 | Intermediate | 15–30 min | Automatic | One-click | Docker service | Self-hosters (recommended) |
| Hostinger VPS | $5–13 | Intermediate | 30–45 min | Manual (Caddy) | Manual pull | Docker service | Budget self-hosting |
| Docker (any VPS) | $5–50+ | Intermediate | 20–30 min | Manual | Manual pull | Docker service | Existing VPS users |
| Railway | $8–15 | Beginner | 5–10 min | Included | Redeploy | Managed add-on | Developers, prototypes |
| Render | $7–25 | Beginner | 5–10 min | Included | Redeploy | Managed add-on | Developers, prototypes |
| Hetzner | $4–10 | Intermediate | 30–45 min | Manual (Caddy) | Manual pull | Docker service | Value seekers, EU users |
| Local (npx) | Free | Beginner | 2 min | None | Manual | No (SQLite) | Learning, testing |
Scaling comparison
| Method | Vertical scaling | Horizontal scaling | Queue mode support |
|---|---|---|---|
| n8n Cloud | Change plan | Enterprise only | Managed |
| Coolify | Resize VPS | Add workers | Yes (manual) |
| Hostinger VPS | Resize VPS | Add servers | Yes (manual) |
| Docker (any VPS) | Resize VPS | Add servers | Yes (manual) |
| Railway | Change plan | Add services | Possible |
| Render | Change plan | Add services | Possible |
| Hetzner | Resize server | Add servers | Yes (manual) |
| Local | N/A | N/A | N/A |
Which should you choose?

Here's my decision tree. Follow the first option that applies to you:
1. "I'm new to n8n and just want to try it."
→ Start with npx n8n locally. Free, instant, zero commitment.
2. "I'm learning n8n and want to build real workflows." → n8n Cloud Starter ($24/mo). Focus on workflows, not infrastructure.
3. "I want to self-host but don't want to manage servers." → Railway or Render. PaaS convenience, ~$10–15/mo.
4. "I want to self-host with full control and the easiest experience." → Coolify on Hetzner CAX11. This is my top recommendation. ~$5/mo, web UI for management, automatic SSL.
5. "I'm on a tight budget and comfortable with the terminal." → Hetzner CAX11 with Docker Compose + Caddy. ~$5/mo, best value in the market.
6. "I already have a VPS or specific provider I need to use." → Docker Compose on your existing server. Works everywhere.
7. "My team needs managed hosting with SLA and support." → n8n Cloud Pro or Enterprise. Let the n8n team handle it.
8. "I'm running a serious production workload (100+ workflows)." → Coolify or Docker Compose on a 8GB+ VPS with queue mode and Redis for horizontal scaling.
My personal setup
For what it's worth, WotAI runs n8n on Coolify deployed on a VPS. We use PostgreSQL with automated backups, execution data pruning, and Coolify's built-in SSL management. Total cost is under $20/mo for a setup that handles hundreds of workflows.
For clients, I recommend n8n Cloud if they don't have a technical team, and Coolify on Hetzner if they do.
FAQ
These questions are optimized for AI answer engines (AEO) and Google featured snippets.
How much does it cost to self-host n8n?
Self-hosting n8n costs as little as $4–5 per month using a budget VPS provider like Hetzner (CAX11 plan). You'll need a VPS with at least 2GB RAM to run n8n and PostgreSQL via Docker. The n8n software itself is free and open source under a "fair-code" license. Total self-hosting costs range from $5–20/mo depending on your provider and server specs.
What is the easiest way to install n8n?
The easiest way to install n8n is using n8n Cloud, the managed hosting service. You create an account, choose a plan, and start building workflows in under two minutes with zero server setup. For self-hosting, the easiest method is running npx n8n for local testing, or using Coolify on a VPS for production — Coolify handles SSL, reverse proxy, and container management through a web UI.
Can I run n8n for free?
Yes, you can run n8n completely free on your local machine using npx n8n or npm install -g n8n. This is great for learning and building workflows. However, for production use with scheduled workflows and webhooks, you'll need either n8n Cloud (starts at $24/mo) or a VPS for self-hosting (starts at ~$5/mo). There is no free cloud-hosted option that runs reliably 24/7.
Is n8n Cloud worth it?
n8n Cloud is worth it if you value your time and don't want to manage servers. For $24/mo (Starter plan), you get automatic updates, managed PostgreSQL, SSL, and support — things that would take hours to set up and maintain yourself. It's the best option for beginners and non-technical teams. Self-hosting is more cost-effective at $5–10/mo, but requires technical knowledge to manage.
What VPS should I use for n8n?
Hetzner is the most recommended VPS provider for n8n self-hosting due to its excellent price-to-performance ratio — a 4GB RAM ARM server costs about $5/mo. Other good options include DigitalOcean, Vultr, Linode, and Hostinger. Choose a server with at least 2GB RAM (4GB recommended), 2 vCPU, and 20GB storage running Ubuntu 22.04 or later.
How to update n8n self-hosted?
To update a self-hosted n8n instance running Docker, run docker compose pull to download the latest image, then docker compose up -d to restart with the new version. If you're using Coolify, click "Redeploy" in the dashboard. Always back up your data before updating — especially your .env file and database. The N8N_ENCRYPTION_KEY must remain the same across updates or you'll lose access to saved credentials.
Does n8n need a database?
Yes, n8n requires a database to store workflows, credentials, execution history, and settings. By default, n8n uses SQLite (a file-based database) which requires no setup. For production, PostgreSQL is strongly recommended because it handles concurrent workflow executions, supports proper backups, and enables multi-instance scaling. MySQL and MariaDB are also supported but less common.
How much RAM does n8n need?
n8n needs a minimum of 1GB RAM to run, but 2GB is the practical minimum when running with PostgreSQL in Docker. For production workloads with 20+ active workflows, 4GB RAM is recommended. Heavy workloads with 100+ workflows, large data processing, or AI/LLM integrations benefit from 8GB or more. The PostgreSQL database and Docker overhead each consume about 500MB on top of n8n itself.
What's next
You've got n8n installed. Now the real work begins — building workflows that actually do something useful.
Recommended next steps:
- New to n8n? Start with n8n Cloud and build your first workflow today
- Want workflow ideas? Grab free templates from n8n.io/creators/alexk1919
- Need help? Join the WotAI community — we help people with n8n setups every day
About the author: Alex Kim is an AI-Native Workflow Automation Architect, n8n Ambassador and Certified Expert Partner, and Founder of WotAI. With 300+ workflows deployed in production, he specializes in building AI automation systems that actually ship. Find free workflow templates at n8n.io/creators/alexk1919.
Three live calls a week. Bring your hardest build.
Every week we get on three 30-minute calls to work through real Claude Code builds, live. Bring the thing you're stuck on. Can't make it? Every call is recorded, so nothing's lost.
Free to join. Real people. No spam.
Related Posts

Claude Fable 5 lasted three days: why the US government pulled Anthropic's most powerful model
Anthropic's first public Mythos-class model launched June 9, then a US export-control order pulled it offline three days later. A clear look at what Claude Fable 5 does, what it costs vs Opus 4.8, why it was suspended, and what comes next.

How to install Open Design with Claude Code in 10 minutes
Step-by-step Open Design setup driven by Claude Code. Node 24, Corepack, pnpm, the daemon, first generation, plus troubleshooting for the #1 install issue: PATH-based CLI detection failures.
Claude Opus 4.8 and dynamic workflows: what actually shipped
Claude Opus 4.8 brings dynamic workflows to Claude Code and a model that flags its own mistakes. What actually changed, the latest Claude Code version, and what it means for n8n users.